Brussel sprouts are a delicious vegetable commonly grown and harvested in cooler weather. It is pretty uncommon to see the everyday gardener growing Brussel sprouts because the general idea is that they aren’t the easiest vegetable to grow. However, I think that should change. Brussel sprouts can be so fun and are easy to grow once you get the hang of it and learn about the things they are picky about.
Brussel sprouts can easily be grown in containers or pots; they need the proper amount of space. As long as you know the right season, how to water, and how to fertilize your Brussel sprout plants, they are so easy to grow!
To learn all the details about growing Brussel sprouts in pots, you’ve come to the right place!


Steps to Growing Brussel Sprouts in Containers
Growing Brussel sprouts in pots are almost the same as growing them. Typically, if you have a five-gallon pot, you can grow one brussel sprout plant. If you have a ten-gallon pot, you can try growing two. Here are the steps to growing Brussel sprouts in pots.
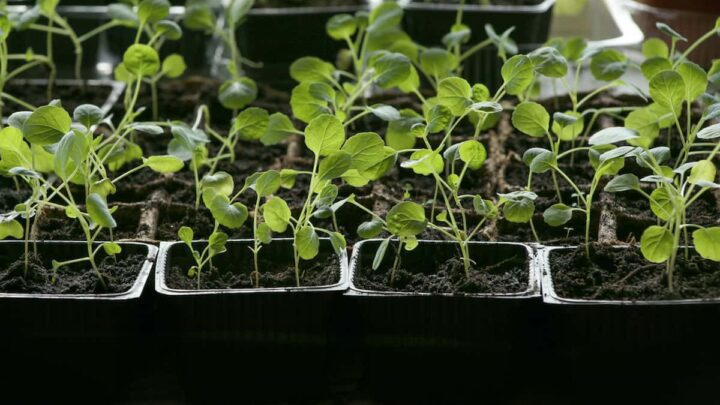
Starting Seeds
Brussel sprouts are a cooler weather plant. You should start your Brussel seeds around four months before the last frost date. They need to be started indoors or in a greenhouse setting because they need temperatures above at least 45 to germinate.
Pot Placement
Placing your pot is an important task. Place the pot somewhere protected from things like animals and wind. Brussel sprouts enjoy the full sun but need at the very least 6 hours of sunlight a day. Once the plant is ready, there should be no more frost; however, if a cold front is coming or weather below 40, take your pot (with the plant) inside for the night.
Preparing the Soil
Brussel sprouts are really like an even mixture of nutrients in their fertilizer. For the NPK (nitrogen, phosphorus, and potassium) levels, you can use a fertilizer that is, for example, 10-10-10 or 15-15-15. These are great fertilizers to mix into your regular potting soil before you plant Brussel sprouts.
It helps if it is a slow-release fertilizer as well, meaning the nutrients will slowly feed your plants throughout the length of their growth. Always make sure your pot and soil are well-draining!
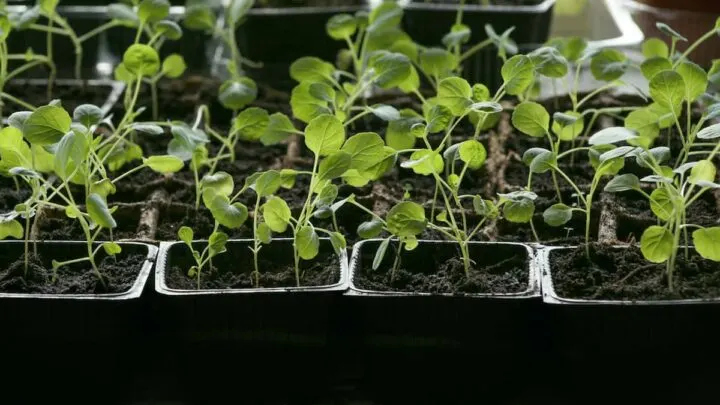
Transplant Seedlings
Once your seedlings are about 5-8 inches tall, with sturdy stems and multiple leaves, you can transplant the seedling(s) into its final destination pot. This goes for seedlings you purchase as well. Again, if you have a five-gallon pot, one brussel sprout seedling will fit comfortably in that pot.
If you are growing Brussel sprouts in pots, a five-gallon pot should be the smallest pot you plant them. Anything smaller, and the plant may not have enough space to grow and produce. Make sure your soil is damp, and carefully place the transplant in a small hole and pat dirt around it once it’s in place.

Spacing
If you have a larger pot (10 gallons or more), you can choose to plant more than one brussel sprout plant in the pot. Brussel sprouts need at least 18 inches apart, so make sure your pot has enough space to determine how many plants can fit into one pot. Brussel sprout roots usually grow anywhere from 18-36 inches deep, so you will want to have a pot that is around that deep.
Caring For Potted Brussel Sprouts
Now all that’s left is to keep the brussel sprout plant nice and happy. Brussel sprouts like to have their soil kept fairly moist but not overwatered. Watering Brussel sprouts to get 1-2 inches a week is recommended. As the stalk begins to develop, you should pick the bottom few inches of leaves from the stalk to encourage the stalk growth upwards.
This is one of the more essential parts of growing Brussel sprouts. Also, as the brussel sprout plant grows, it’s good to tie a stake against the plant to keep it from tipping over. Bamboo stakes are the best choice to use. Continue fertilizing your plant using a 5-10-10 or a 10-5-10 liquid fertilizer once a week to help maintain the nutrients getting to the plant.
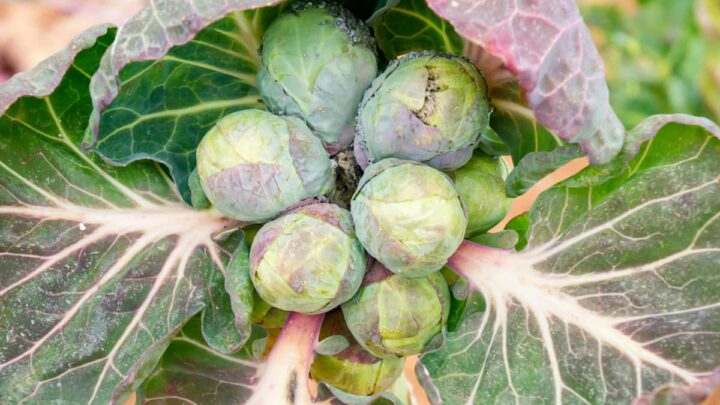
Harvesting
Brussel sprouts are slow growers and will generally grow for around three months until they are ready to harvest; this is why you should start the seeds so early. When they are no more than 2 inches in diameter and no less than 1 inch in diameter, this is when the sprouts are ready to be harvested.
They will feel slightly and have a lush green color. Lower sprouts are usually ready before the upper ones, and you can harvest them first while you wait for the rest. Do not yank the sprouts off; carefully twist them until they pop off. Brussel sprouts are a one-and-done type of harvest.
Pests and Disease Known to Attack Brussel Sprouts
The nice thing about growing your Brussel sprouts in pots is that they are removed from the rest of the garden, meaning they aren’t as vulnerable to getting pests or disease damage. However, there still is a chance of things sneaking in and causing damage. These are the top five pests and diseases known for attacking Brussel sprouts.
| Pests | Diseases |
| Aphids- Luckily, if properly treated, aphids can be eliminated from your garden. Sometimes if the outbreak is small, you can simply try spraying the aphids off with water. For worse cases, try spraying your plants with a vinegar and water mixture, or with neem oil. Aphids are very visible and look like clumps of white little bugs gathering everywhere on your plant. | Alternaria Leaf Spot- A common disease for members of the brassica family. This disease looks like round gray, black, and yellow spots, around the size of a quarter covering the leaves of your plants. For the most part, it is just a cosmetic issue that will affect the leaves first, however, if your Brussel sprouts have started forming, the disease will carry onto them as well. It is a fungus and can be treated as such with fungicide, or go left untreated if it is late in your brussel sprout plant life. |
| Earwigs- Earwigs are a nuisance to a lot of gardens. When talking about Brussel sprouts, they really only do damage to seedlings, which they will eat the entire seedling. The only way to prevent this is by keeping your seedlings indoors until they are hardy enough to be outside. Otherwise, earwigs are actually really good for gardens and will eat other bugs like aphids and small annoyances. | Black Rot- Black rot is a bacterial disease that affects brassica family members as well. Black rot is a pretty bad one to get in terms of diseases. It will kill your entire plant and, even worse, it’s untreatable. It will first show itself by leaving the leaves looking yellow and dry. You can try using a copper-based fungicide to help slow the disease down, but eventually, the plant will get killed by the disease. |
| Armyworms- Small green caterpillar-looking bugs that will chew through leaves and even the stems, doing a lot of damage if left to go wild. They will go away if you spray your plants with insecticide, or you can try making a vinegar/water mixture with a dash of dish soap and spraying it on your plants. Alternatively, if there are only a few worms, you can even just pick them off as you see them. | Clubroot- Clubroot is exactly how it sounds. The roots of the plant will club and bind together. Of course, unless you dig up the plant, it is impossible to tell it’s happening. The plant from the top will start to look yellow and pale and stop growing or only grow slightly. The plant may also appear to look like it needs water, although it has been watered. It can’t really be treated, but adding lime to raise the pH levels in the soil may manage the disease. |
| Flea Beetle- Flea beetles are extremely small and very hard to see from the naked eye. They usually attack the leaves on the bottom of the plant and they chew through the leaves, leaving holes. You can get rid of these the same way you would aphids, you can also try insecticide if the attack is very intense. | Powdery Mildew- Powdery mildew looks basically, like mildew or mold growing over the leaves of your plant. It occurs when the leaves get wet and don’t dry. Powdery mildew is basically just cosmetic as well, though it will spread quickly to other plants. Sulfur is an effective way to treat powdery mildew. |
| Cabbage Looper- Very similar to the armyworm, with a few differences. The cabbage looper is a bit lighter in color and rather than leaving trails of damage, they chew separate holes through the leaves. They also make loops as they walk. You can treat these exactly how you would armyworms. | Bacterial Leaf Spot- This disease leaves brown and yellow halo-looking spots on the leaves of brussel sprout plants. This disease generally only occurs in damp, moist climates. This disease is not treatable. |


Final Thoughts
Although Brussel sprouts are not a very common plant to be grown in the everyday garden, they don’t have to be hard to grow and are very fun to watch expand and thrive. Brussel sprouts grow great in pots which is especially helpful if you work with limited space. As long as you have big enough pots to hold the Brussel sprouts, ensuring they have ample space to grow, you’re all set. Happy gardening!

Hi there, my name is Allie and welcome to my blog; GareningWithAllie!
Much of what you see written here is just our personal experiences with gardening. Along with the content I write here, there is also a unique collection of gardening topics covered by some of our close friends. I hope you find everything you read here to be helpful, informative, and something that can make your gardening journey the most lovely experience ever! With that said, Happy Gardening!