Seed-starting can be intimidating for those who’ve never done it before. Everything from soil mix to lighting and watering is a question that needs an answer. One thing that might get glossed over when talking about growing seedlings is the vessel being used. Some people use egg cartons, and some use solo cups. These have their place when used for seedlings, but how long can seedlings stay in solo cups?
Usually, it is best to transplant seedlings from solo cups around 1-2 weeks after leaves have begun to form. The development that occurs during this time is usually somewhat significant, and the confines of the solo cup unfortunately are not conducive to the continued growth and development of the plant.
Fortunately, solo cups can be reused for seedlings and are inexpensive to acquire. Read on to learn more about using solo cups for seedlings and transplanting from cups, along with some tips on how to best go about the process.

Are solo cups suitable for seedlings?
Solo cups are a cheap, easy way to start seeds and seedlings. They can be cut down to be more shallow, have drainage holes poked into the bottom, and are readily available in many stores. They can also be washed out and reused, making use of what is traditionally a single-use plastic cup.
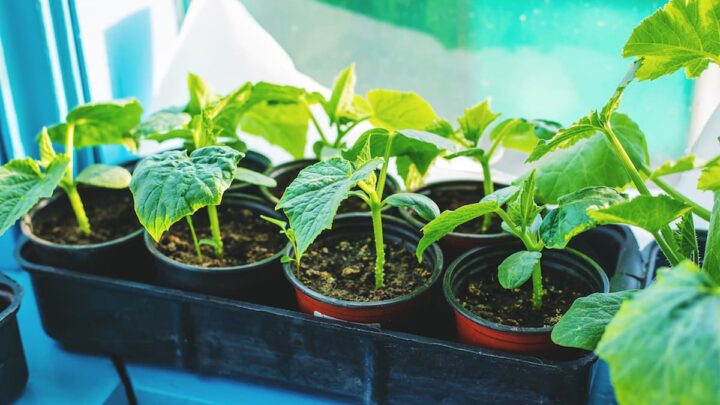
Seedlings can be started individually using solo cups and are easy to remove from the cup when it is time to transplant. They also don’t take up much space to fit into areas where some more traditional seed-starting mats may not.
Simply add some drainage holes to the bottom of the cup, add potting mix, gently water your plant, and provide a warm place out of direct light. After a week or two, the seeds should germinate, and some proper leaf development should be underway.
Shortly after this, transplanting will be necessary to keep your plant growing. Keeping a young plant rootbound can severely stunt its growth, so it is essential to give sufficient room to your seedlings for their roots to develop a robust system to support the rest of the plant.
How often should I water my solo cup seedlings?
For the first two weeks of life, watering should happen daily. Many processes occur at this stage that requires hydration, and smaller plants will dry out quicker than larger ones. Seeds that have not yet germinated also need daily watering and protection from evaporation, so covering seedlings is advised.
After those two weeks, you can switch to watering when the soil’s surface dries; 2-3 days, depending on conditions like humidity and temperature. Hotter, dryer areas will require more watering and care, whereas humid areas in a moderate climate will not dry out as quickly.
After about a month, your plant is likely ready to be transplanted. At this point, the watering needs are more dependent upon location, temperature, and type of plant being grown. These are all factors one should be aware of before starting the seeds, just to be sure the seeds they intend to plant can grow under the given conditions.
Caution should always be taken to not over-water your seedlings. When in doubt, it is better to wait an extra day before watering and let your plant dry out a bit more than to potentially overwater and cause root damage.
How do you transplant a plant from a solo cup?
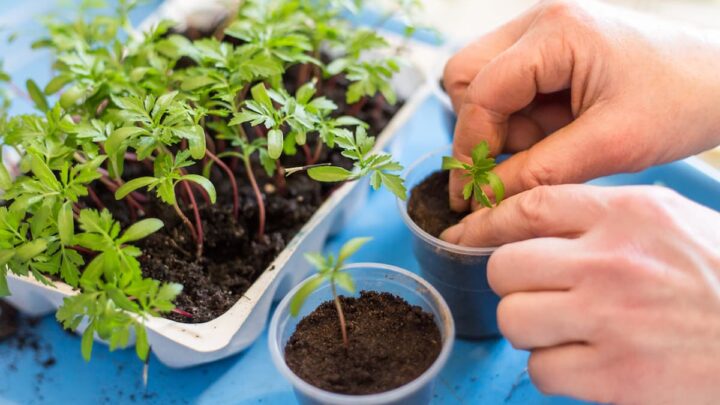
Transplanting from a solo cup can be done in any way that you can gently retrieve your plant.
You can cut a slit in the side of the plastic cup and carefully remove your plant. Do this carefully to avoid cutting any roots. You should see a robust root system forming and no signs of rot or damage to your seedling. Keep in mind that you will not be able to reuse these cups in the future if you want to start more seeds.
You can also tilt the cup over and softly squeeze the cup to coax your plant out. Take care to support the seedling so it does not get crushed when the soil and roots come out of the cup. The plant will easily come out of the cup if the soil is not overly wet. If this is the case, wait another day or two before removing it from the cup to avoid unnecessarily damaging roots.
After removing your plants from their solo cups, be prepared to transplant them into larger containers or get ready to move them outside.

Tips for successfully transplanting seedlings
Having seedlings set up in a controlled environment is excellent, though if you’re planning on setting your seedlings outside, you will want to prepare them for the uncontrollable nature of the great outdoors.
Hardening off your seedlings will prepare them to transition to the outside world. While your seedlings are still in the solo cup, you will want to slowly acclimate them to the conditions they will be facing in the future. This consists of taking your plant outside in a shaded area for an hour one day, increasing the amount of light and hours outside until you’ve got your seedlings experiencing a full day out exposed to the conditions where you’d like to plant them. This usually is done over a period of 7-10 days.
After this, you can safely know your seedlings are less likely to go into shock when being moved.
Preparing your soil beforehand is also a good way to ensure the survival of your seedlings. Amendments to the soil can be made depending on your plant’s needs, such as pH and nutrient profile. Choosing an overcast day to set the plants outside can also cut back on the risk of transplant shock.
The soil of your seedling and the soil you are planting into should both be moist; too wet or too dry soil can cause root damage when moving your plant out of its original container into a new one or into the ground.
Another tip for successful transplanting is to know the needs of your seedlings before you transition them outside. You don’t want to put your full-sun herbs in the ground where there is mostly shade through the day. Not only does this cause you to stress from seeing your plants withering away, but it will cause your plants to stress from the damage caused by poor conditions and having to deal with being uprooted and then re-planted. Taking the extra time to be prepared is worth the peace of mind it will bring.
If you’re transplanting to larger containers that will stay indoors, still be mindful and know your specimens’ light and watering needs.
Final Thoughts
Starting seedlings can be done in almost any vessel if there is the ability to have a bit of drainage. Solo cups are accessible, lightweight, inexpensive, and even reusable, depending on how you choose to remove the seedlings.
Solo cups are a reasonable and viable option to start seeds and grow seedlings, and any methods which work for the plants and for the gardener should be utilized to their fullest.
When the basic needs of a growing plant are met, the container used can be anything: so why not a solo cup?

Hi there, my name is Allie and welcome to my blog; GareningWithAllie!
Much of what you see written here is just our personal experiences with gardening. Along with the content I write here, there is also a unique collection of gardening topics covered by some of our close friends. I hope you find everything you read here to be helpful, informative, and something that can make your gardening journey the most lovely experience ever! With that said, Happy Gardening!