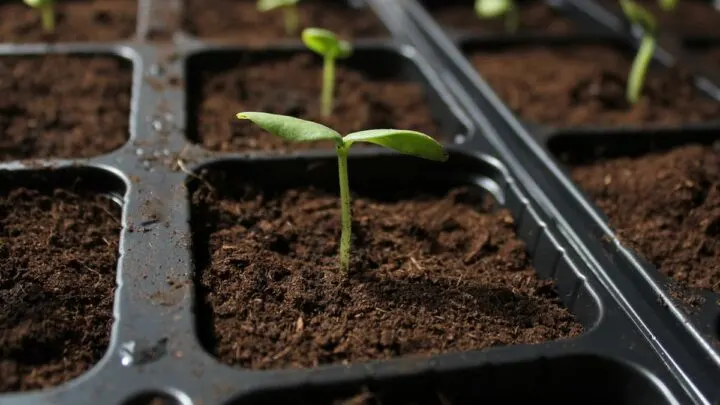
Transplanting a germinating seedling is an essential part of the growing process. Seedlings are sensitive, so it’s crucial to transplant carefully and at the proper time. The evening is the best time for seed transplantation, though you might not know why.
It’s better to transplant seedlings in the evening because they’ll have more time to adjust to the soil without the pressures of the hot sun. With all of the changes happening when seeds go from pots into the ground, they need to adjust slowly, making the evening the best time to do it.
When transplanting seedlings, knowing when and how is critical; we’ll provide the answers along with a breakdown of how you can safely transplant your seedlings step by step.

Can I Transplant Seeds In The Afternoon?
Before transplanting, you’ll need to consider the weather at the moment and in the next few hours to come. The key is avoiding temperatures that get too high, making the afternoon one of the worst times to transplant.
The afternoon is okay only if it’s cloudy and the temperatures aren’t expected to get too high. If you’re unsure, it’s better to be on the safe side, planting very early in the morning or waiting until late evening.
When To Transplant Seedlings
Successfully transplanting seedlings requires the right conditions. The best time to start transplanting is in the summer when night and daytime temperatures are steadily above freezing. Any large fluctuation in temperature can damage seedlings and may result in their death before they’re able to grow.
Once temperatures check out, it’s recommended to transplant about three weeks after seedlings first sprout. You should start to see true leaves growing, sprouting right after the first growth, later turning yellow and dropping off. Don’t immediately transplant them over; instead, allow them to sit outside a few days before to adjust to temperatures gradually.
How To Transplant Seedlings
Transplanting is all about finding the right conditions for your plants. Seedlings grow the best when they can adjust to their surroundings slowly, keeping them from going into shock from changes that come too quickly. Before transplanting, growers should first prep their seedlings, which they can do in just four steps.
To Prep
Step #1. Slowly Prepare Your Plants
About a week before you’re ready to transplant, give your seedlings some time outside. This will allow them to adjust slowly to new conditions so that, once transplanted, they will not go into shock that could potentially stunt their growth.
Step #2. Loosen Soil
Before transplanting seedlings, you’ll also want to loosen up the soil. Loosening up soils adds oxygen into the mix, which helps soils maintain moisture and nutrients once they’re added. Loosen up all the ground where you intend to transplant seedlings, adding a bit of organic matter into it as you mix, so it’s nutrient-rich before adding seedlings.
Step #3. Raise Soil Temp
Temperatures that are too low can cause seedlings to go into shock. This could either stunt their growth or cause them to die. One way to prevent this sudden shock is to increase soil temperatures before adding seedlings by adding fabric over the soil at least one week before planting.
Step #4. Watch Your Step
Stepping on soils will lead to compaction, which is not what you want before transplanting. Avoid walking over the area you plan to transplant, keeping soils nice and loose for easy planting.

To Transplant
Once you have soils prepped, it’s time to transplant. Remember to:
- Allow seedlings time to adjust (at least one week)
- Warm soils up (at least one week)
- Transplant in the evening for best results
Step #1. Check Moisture
Don’t just drop seedlings into the soil. First, check soil conditions, including moisture levels. You want it to be moist, not too wet or too dry. If you have doubts, you may need to water well and then wait for the next day to transplant.
Step #2. Level
Since you previously dug up soils, you’ll want first to create level ground. Grab a rake and smooth out the surface before transplanting so that planting goes smooth.
Step #3. Add Holes
Next, you’ll want to start adding the holes where you’ll transplant seedlings. You may need to first look at seedlings, see their growth around roots, and gauge how big a hole you need. Then, add holes at least five inches away from one another. This will prevent overcrowding when plants start to grow.
Step #4. Turn Pot Upside Down
Your seedlings have likely sprouted a bit, so you should gently remove them. Be especially gentle around the roots, taking care not to disturb them too much. You can turn the pot upside down, allowing the excess soil to fall and the roots to come out slowly.
Step #5. Gently Place Seedling in Hole
Place the seedling in the hole you dug previously. You want to shoot for the same depth in which it was growing, so make sure the hole is deep enough before adding it to the soil.
Step #6. Give It a Tap
Fill in the hole and cover with extra soil. As you do so, tap it in a bit. Tapping and gently pressing the soil down will help the roots contact the soil, giving them a chance to soak up all the nutrients.
Step #7. Add Water
Once seedlings are in and covered with soil, you’ll want to water the area. This will help everything settle in and help reduce any air pockets, so roots are surrounded by nutritious soil.
Step #8. Get On a Regimen
Once you have seedlings transplanted, it’s important to get on a regimen to keep them healthy. That includes:
Fertilizer
Use a started fertilizer at first, adding it a few days after transplantation. You can do this every other week, adjusting as your seedlings start to sprout.
Water
Water is essential for all plants, so give your seedlings the water they need. Find out how much water your specific plants will need the more they grow, making sure you don’t overdo (or underdo) it.
Mulch
If your area is experiencing high temperatures or drought, it can be necessary to add mulch. This will keep soil moist, which can help combat stress due to high, dry temperatures.
Final Thoughts
Transplanting seedlings requires careful attention to the climate and the time of year. Before transplanting, prepare your garden, avoiding any shock to delicate seedlings. After prep, gently add seedlings, keeping them watered and nourished as they make their way from seedling to fruit-bearing plant.

Hi there, my name is Allie and welcome to my blog; GareningWithAllie!
Much of what you see written here is just our personal experiences with gardening. Along with the content I write here, there is also a unique collection of gardening topics covered by some of our close friends. I hope you find everything you read here to be helpful, informative, and something that can make your gardening journey the most lovely experience ever! With that said, Happy Gardening!
