Pumpkins are a staple fall squash that is prized for its versatility as decor, sweet or savory foods, and even as popular drink inspirations. They are also easy to store over winter and stay good for a long time when stored properly, allowing your fall harvest to last you throughout the winter. It might be the perfect time to add some pumpkin vines to your autumnal garden.
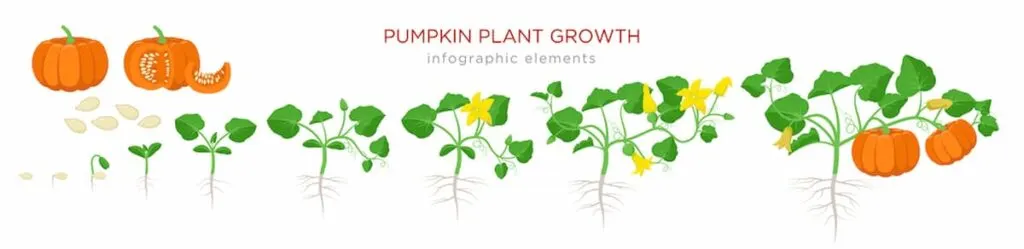
Pumpkin growth stages are not much different than other cucurbits’ growth stages, which are ultimately very similar to most other fruiting plants. The importance lies in understanding where the plant is in its growth stage so it can be properly tended to for the most bountiful harvest possible.
Continue reading to learn more about pumpkin growth stages and how long the process takes from seed to harvest.

What are the stages of growing a pumpkin?
Seed
Like most plants, pumpkins start from seeds. Pumpkin seeds can be started indoors in areas with short growing seasons or planted directly in the ground about two weeks after the last frost occurs.
Starting seeds inside can be done at the start of spring. Plant the seeds about 1 inch deep, whether you are planting inside or directly in the soil.
If you are planting seeds outdoors, you will want to plan for the space each plant will need. Plant seedlings about 5 feet apart to allow enough room for the root system and vines. Choose a location in your garden where the soil is well-draining and you have full sun for most of the day. Ensure your soil’s pH is between 6.0-6.8 for best results, as some nutrients are unavailable to the plant above a certain pH.
Sprout
Most varieties of pumpkin seeds will germinate in 7-10 days from planting. Using a heating mat or pre-germinating seeds can speed the process and help increase success. If your seeds are planted outdoors, and the ground is still relatively cold, you can expect a bit longer wait before you see the first two leaves break the soil.
True leaves
True leaves appear after the first two leaves, referred to as cotyledons, emerge. These true leaves will be broader, darker, and more robust.
At this point, if you are growing indoors, you will want to work on hardening off your seedlings to get them ready for transplanting outdoors. To do this, you can by setting your seedlings outdoors in a relatively protected area for an hour or two on the first day.
For the next week, slowly increase your plant’s exposure to the outdoors until they can spend a whole day outside. Once you’ve completed this process, your seedlings will be much less likely to suffer from transplant shock.

Formation of Vines
Since pumpkins grow on vines like other cucurbits, it is best to give them ample room to spread out. The growth of vines occurs very rapidly, with the vines extending multiple inches in a day if under optimal conditions. Plants placed too close to each other can cut off air circulation, leading to potential disease or pest issues.
Once your plant is around 12 inches tall, you can begin to fertilize with a high-nitrogen fertilizer for foliage growth. Switch to a fertilizer higher in phosphorus at about day 50-55 in development, which is right before your plant should begin to set flowers.
Fertilizing with higher nitrogen fertilizers too far into your plant’s growth can lead to fewer flowers developing and an over-abundance of foliage.
Flowers
The first flowers to appear on the vine are the male flowers. Female flowers will appear after another week, and pollination can begin. Bees and other pollinators can spread the pollen from the male to the female flower, or you can hand-pollinate your pumpkins.
Hand-pollination can be done using a clean, soft paintbrush. This is usually done during the day when the blooms are open, as you will need to collect pollen from the male flowers. The male flower can be distinguished from the female because the male will have one single part sticking up in the middle of the flower, called the stamen. You can gently collect the pollen from the male flower and transfer it to the female flower.
Another way you can tell apart male and female flowers is by looking at the base of the flower: males will be slender, while females will have a slightly swollen base, where the fruit forms. This is a good way to differentiate the two flowers when they are not open.
After about a day, the flower will close, indicating it has been pollinated.
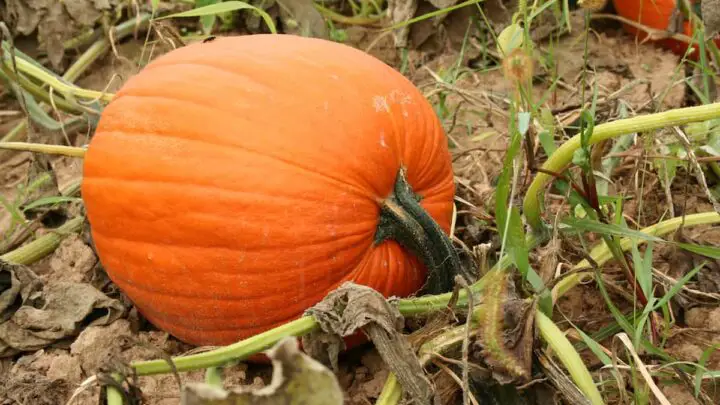
Fruits
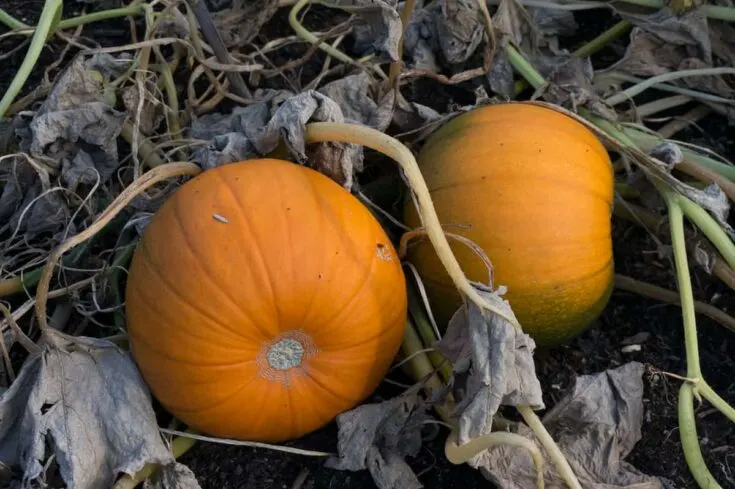
The base of pollinated flowers will begin to swell with a tiny green pumpkin. Over the next few weeks, it will grow and lose its green color in favor of a more familiar orange hue if using an orange variety of pumpkin. Sunlight is essential in developing color, so rotate your pumpkins every few days to get even color development. This will also help to maintain an even shape. Take care not to break the stem when rotating.
A mesh layer on the soil or thin board can be placed underneath growing pumpkins to protect them from pests and potential rot from contact with the moisture on the ground.
Larger pumpkins can be grown if desired by selecting a few blooms to see through to harvest by snipping off all other flowers. This focuses energy to go towards the few remaining fruits on the vine.
Harvest and Storage
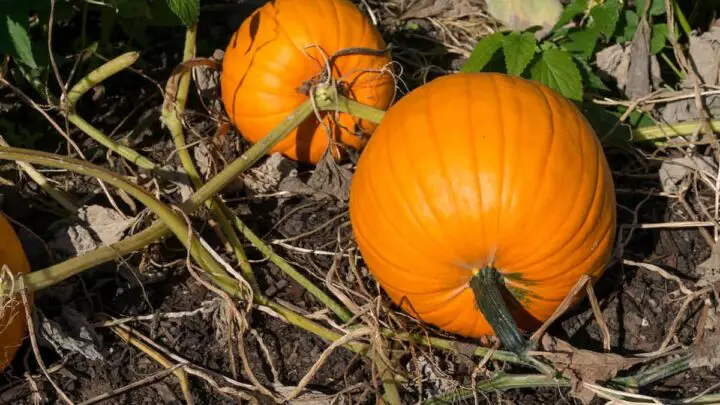
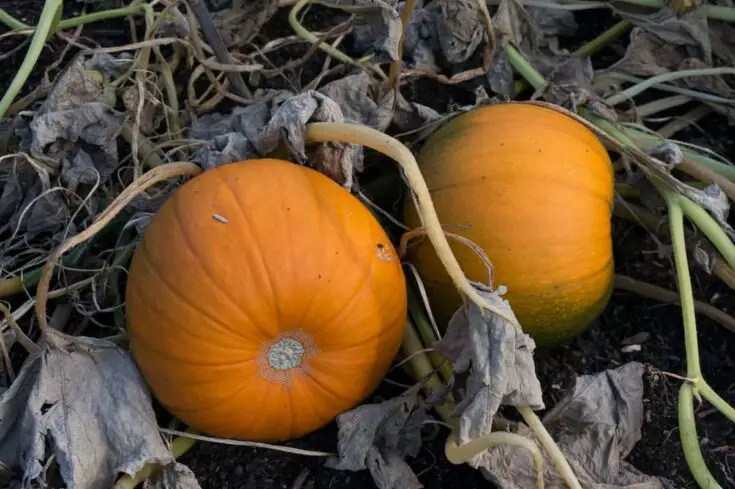
A sure sign of pumpkins that are ready to harvest is visual indicators of the “classic” pumpkin look, and the vines will begin to die off. This is your cue to harvest your pumpkins!
Take a sharp knife to remove the stem from the vine, leaving at least a few inches of stem on the pumpkin.
The pumpkins can be placed in the sun for a minimum of two weeks to finish ripening and curing. The curing process thickens and hardens the outer skin, making pumpkins good candidates for storage over the winter months.
Store them in a cool, dark, dry space between 50-60ºF for long-term storage of up to 6 months, though storing them in a dark pantry for use within a few weeks works.
How long does it take to grow a pumpkin?
It takes about 90-130 days to harvest a pumpkin when starting from seed. The time it takes to grow depends on conditions, location, variety chosen, and how well the plant has been tended.
| Stage | Days After Planting Seeds |
| Germination | 7-10 |
| Foliage and Vine Growth | 10-54 |
| Flowering | 55+ |
| Fruit Development | 65+ |
| Maturity and Harvest | 90-130 |

Optimal growing conditions for pumpkins are full sun, well-draining soil, and a balanced fertilizer routine to tend to the plant’s changing needs during its growth. Larger growing pumpkins will need more time to mature, while smaller varieties can reach their full size quickly.
Growing season and climate differences cannot be understated. However, crafty gardeners can extend their growing season by planting seeds indoors when it is still too cold outside to plant directly in the ground.
If growing a plant from an established seedling instead of directly from the seed, you can subtract a week from the overall time you’ve had your plant. You can track its growth based on days since the plant has germinated, so you approximate the stages your plant is in to fertilize accordingly.
Final Thoughts
Pumpkins are iconic in the fall season, and for excellent reasons. There are many pumpkins available to grow, from small pumpkins that can grow upwards on a trellis to large, prize-winning types that can weigh up to 200 pounds on 20-foot vines and everything in between.
Learning about pumpkins and their growth stages can help gardeners fine-tune their care routine to grow sizable, storable gourds. These pumpkins can be used for decoration and consumption in many different forms, seasonally and after harvest.


Hi there, my name is Allie and welcome to my blog; GareningWithAllie!
Much of what you see written here is just our personal experiences with gardening. Along with the content I write here, there is also a unique collection of gardening topics covered by some of our close friends. I hope you find everything you read here to be helpful, informative, and something that can make your gardening journey the most lovely experience ever! With that said, Happy Gardening!