Honeydew melons are a great beginner gardener fruit. They are easy to grow and so worth it in the end. Melons, including honeydew melons, are typically grown in a raised bed or directly in the ground. However, it is possible and even much more convenient in some cases to grow honeydew melons in containers.
With the right container and the right conditions, growing honeydew melon in containers is a great way to grow the melons! This information is convenient if you are short on space in your raised bed garden, or maybe you don’t have yard space at all and can only grow plants on your deck or patio.
If you would like to know all the details of growing honeydew melons in containers, you’ve come to the right place.

Getting Started
There are a few ways to get your honeydew melons started for growth. You can either buy seed starts or seeds. If you buy seeds, you can either start the seeds in seed trays or direct seed them. Honeydew melons don’t usually like to be transplanted, so I recommend directly planting the seeds into the container.
You may be wondering now which container is possible for this mission… and there are a few different ones you can use. The general rule of thumb is as long as you grow one honeydew melon per 5-gallon pot, you will be fine.
Melons like their space; they vine out and need lots of space for their roots. Having more than one plant in a 5-gallon pot would stunt the growth of the melons. Now, if you have a 10-gallon pot, you might be able to get away with putting two plants in it. Here are some examples of containers you can use.
Fabric Grow Bags
This may be the best option for you if you are growing honeydew melons in a container. There are a lot of pros AND cons to using grow bags, but I think they would work out perfectly in this instance. The great thing about grow bags is that they support very healthy root growth and make it so the plant will never get rootbound.
This is great for plants, especially when you directly sow seeds into pots and you don’t plan on transplanting them. The only downfall is the grow bags is that you will have to water them more frequently, and they do not last as long.
However, since melons only last one season anyway, that factor wouldn’t be that big of an issue in this case. Always try to use fabric grow bags instead of plastic ones if you can.

Ceramic Pots
Ceramic pots are another great way to house your honeydew melons. Remember, make sure it is large enough for the plant (at least 5 gallons) and has proper drainage.
Ceramic pots are pretty difficult to move once everything is inside, so make sure it is in a good spot, one that is very sunny for at least 8 hours a day. Ceramic pots are the best way to go if you have a certain vision for your garden since they look the nicest.
Hard Plastic Pot
Hard plastic pots are the cheapest and easiest pots to use. They are light and durable; however, the hard plastic does retain a lot of heat, so you will have to water it more frequently. Always make sure the hard plastic, and any container you use, has proper drainage holes in the bottom.
Another downfall of hard plastic is that it is a bit of an eyesore, and it’s not very environmentally friendly. You can reuse them, though, so don’t throw them out after one season. Try painting it to give it some pretty flare.
Hopefully, now you’ve decided on the perfect container for you and your situation. As I said, I recommend directly planting the honeydew melon seeds right into the containers. Fill your pot with good organic loamy soil. Honeydew melons are like very well-draining soil, so that is why loamy soil is essential.
Make a small hole in the center of your pot, no more than 1/2 an inch deep, to plant your seed. Cover and water in well. Honeydew melons take about 1-2 weeks to sprout. In order to germinate, the soil should stay moist, and the seed needs at least 14 hours of light to sprout.
Since we are direct seeding, your pots should either be indoors, or the outside temperature needs to be above 65 degrees. Honeydew melons need a soil temperature of at least 70 in order to germinate. Temperature is very important for these plants as they are very cold weather sensitive.

Tending to Honeydew Melon Plant
After no more than two weeks, the honeydew melon plant should have sprouted and is now happily growing. Besides just waiting, the plant needs some tending to make it grows healthy. Here are some honeydew melon plant gardening tips.
Water
Honeydew melons need about 1-2 inches of water a week. This roughly means you should water once every other day. However, as I mentioned above, if you are using a hard plastic pot or fabric pot, you should keep an eye on the soil and water accordingly.
Especially if you live in a very hot and dry area, your plants will most likely need to be watered every day. Try to water in the mornings and keep the water off the leaves and the fruit to avoid fungal diseases.
Trellising
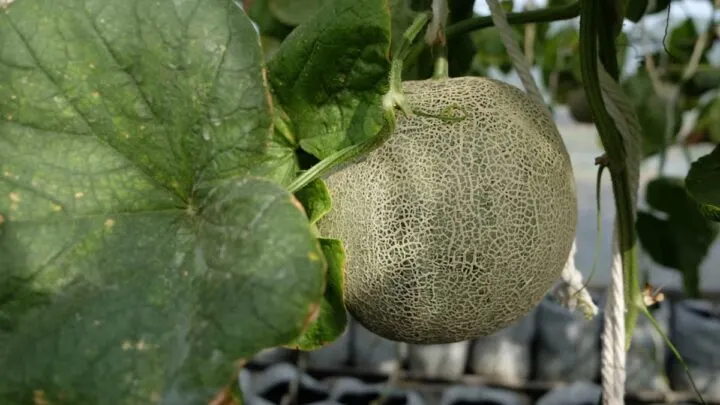
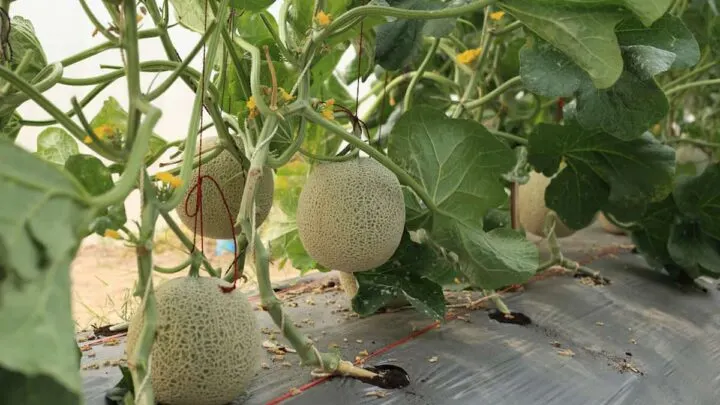
Think about how a honeydew melon grows when it is directly on the ground. Its vines can grow to be pretty long, and the fruit tends to be fairly heavy. If you are growing in a container, the plant will need support. As the vines begin to grow, you have a few options.
You can put up tomato cages around your pots for the vines to cling to, use a plastic trellis as support, and use a piece of fencing or a pallet for the vines to lean against and grip. As the fruit begins to form, create a sling out of old pantyhose or elastic netting, wrap it around the fruit and tie the netting to the trellis. This will help the melon rest safely without getting too heavy and either breaking off or breaking the whole vine.
Fertilizer
Honeydew melons are heavy feeders. They need lots of extra nutrients in order to produce yummy sugary fruit. Without the proper nutrients, the melons can end up tasting bitter. They like well-balanced fertilizers in the beginning stages; using a ratio of 10-10-10 is great until they start fruiting.
Once melons start to form, you can cut back on the nitrogen and pump up the phosphorus, which is how the fruit gets its sugar. Using a fertilizer with a 3-5-15 ratio or something similar is excellent for the fruiting stage of the plant’s life.

Harvesting Honeydew Melons
Honeydew melons are done anywhere between 65 and 100 days. Different varieties take longer than others. You’ll know when your honeydew melons are ready to be harvested when the rinds turn a very pale yellow rather than green, and the skin will look smooth.
Another way to tell is if you press on the end of the honeydew melon, the part that is not attached to the vine, it should feel ever so slightly springy and soft. You may have waited too long if it’s too soft.
What Varieties of Honeydew Are Best to Grow in Containers?
There are many different offsprings of the honeydew melon, and they are all unique. Some are better for growing in containers because they produce smaller melons that aren’t as heavy. Here are some of the best varieties of honeydew to grow in containers.
Snow Leopard
Snow leopards are great for growing in containers because, on average, they only get to about 2 pounds per melon. These are unique melons as they appear to be very pale color, almost white. The flesh inside is white as well.
Galia
A very original honeydew melon, these melons are perfectly round and sweet in taste. These melons only get to be about 2-3 pounds per melon.
Honey Orange
It is very similar to cantaloupes; however, their skin is light, pale, and smooth, with the same orange flesh as a cantaloupe but a lighter shade. These melons are about 3 pounds on average.
Final Thoughts
Honeydew melons are a fun and easy fruit to grow. If you feared you wouldn’t have space in your yard or raised bed to grow them, there is no need to worry! Honeydew melons can grow ideally in pots as long as they have the right amount of space and some supporting trellis. Happy gardening!

Hi there, my name is Allie and welcome to my blog; GareningWithAllie!
Much of what you see written here is just our personal experiences with gardening. Along with the content I write here, there is also a unique collection of gardening topics covered by some of our close friends. I hope you find everything you read here to be helpful, informative, and something that can make your gardening journey the most lovely experience ever! With that said, Happy Gardening!
